
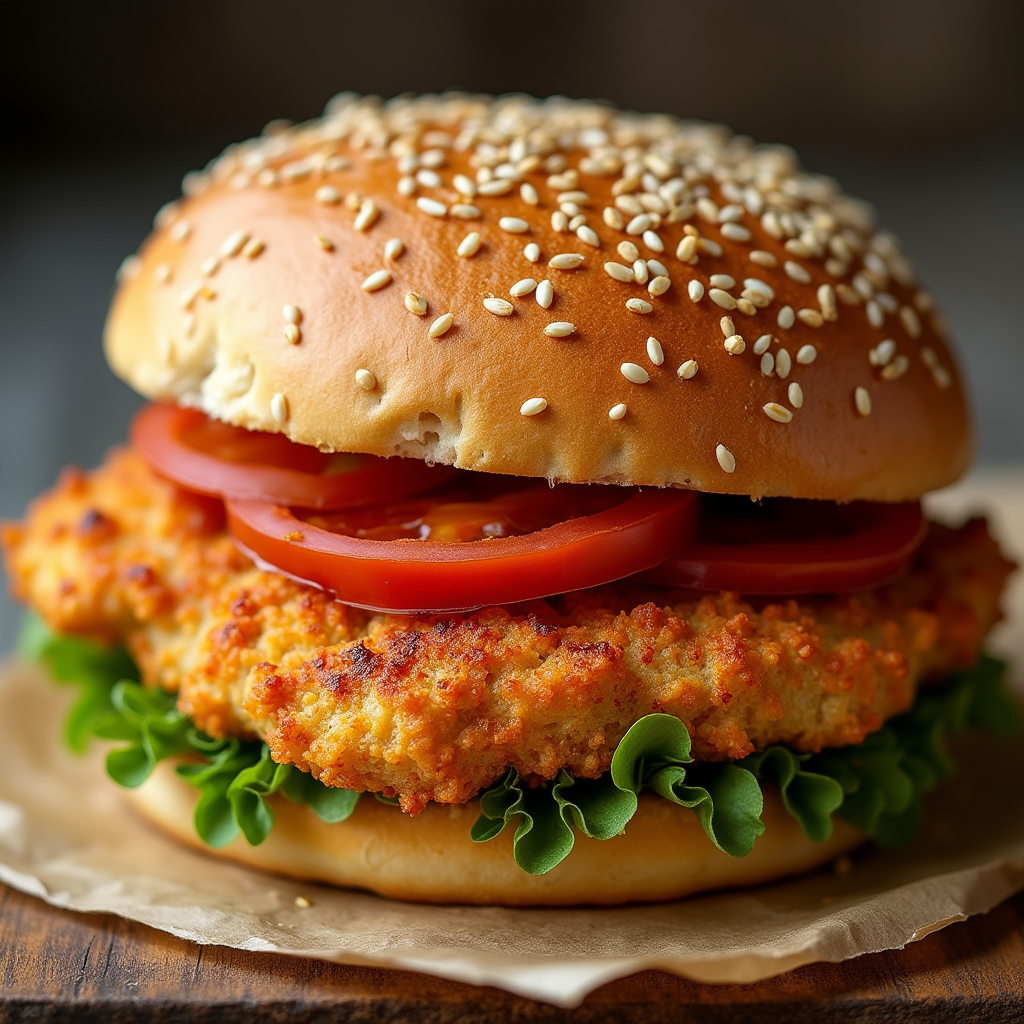
A chicken sandwich is one of the most delicious and popular meals you can make at home. Whether you prefer it grilled or crispy, the perfect sandwich combines tender chicken with fresh ingredients, all inside soft, toasted bread.
Unlike store-bought options, making a chicken sandwich at home gives you full control over the ingredients, ensuring a delicious and satisfying meal. You can carefully choose its components to match your personal preference. In this guide, we’ll walk you through everything you need to know to create the perfect chicken sandwich—from selecting the right ingredients to cooking methods and the best ways to serve it. Let’s get started
Ingredients for the Perfect Chicken Sandwich
Choosing the Right Chicken
Selecting the right type of chicken is the foundation of making the perfect chicken sandwich. The texture, juiciness, and overall flavor of your sandwich depend on the type of chicken you use. Here’s a detailed look at the best options and how to prepare them properly.
1. Chicken Breast vs. Chicken Thighs – Which is Better?
When making a chicken sandwich, the most common choices are chicken breast and chicken thighs, each with its own unique qualities:
- Chicken Breast: This cut has a firm texture and holds its shape well, making it perfect for grilling or baking. It may require extra care during cooking to ensure it remains tender.
- Chicken Thighs: These are naturally more tender and juicy, making them an excellent choice for frying or grilling. They stay moist and flavorful, even when cooked for a longer time.
2. Fresh vs. Frozen Chicken – Which is Better?
Both fresh and frozen chicken can work well, but there are a few things to keep in mind:
- Fresh Chicken: If available, fresh chicken is the best choice for optimal flavor and texture. It also requires less preparation time and tends to retain its moisture better.
- Frozen Chicken: If you’re using frozen chicken, make sure to thaw it properly. The best method is to place it in the refrigerator for several hours or overnight. Avoid thawing it at room temperature, as this can lead to uneven cooking.
3. Preparing the Chicken for Cooking
Proper preparation ensures that the chicken cooks evenly and remains tender. Here are a few key steps:
- Flattening the Chicken: If using chicken breasts, it’s a good idea to flatten them slightly using a meat mallet or rolling pin. This helps them cook more evenly and makes them more tender.
- Cutting the Chicken Evenly: Ensure all pieces are roughly the same size to ensure even cooking, preventing some parts from drying out while others stay undercooked.
By selecting the right type of chicken and preparing it properly, you’ll ensure your chicken sandwich is tender, juicy, and delicious. Now that the chicken is ready, let’s move on to choosing the best bread
Choosing the Right Bread or Bun
The bread or bun you choose is a key component that adds flavor and texture to your chicken sandwich. Its role goes beyond just holding the chicken together; it enhances the flavor of the chicken and adds a satisfying layer in every bite. Here’s a breakdown of the best bread and buns and how to choose the one that suits your taste.
1. Soft Breads vs. Crispy Breads – Which One to Choose?
The first decision you’ll need to make is whether you’ll go for a soft or crispy bread. Each option has its benefits:
- Soft Breads: Soft breads like milk bread are slightly sweet and very soft, providing a light and airy texture with every bite. These types are perfect for those who prefer a smooth texture that doesn’t overpower the chicken’s flavor. Additionally, these breads absorb the juices from the chicken, helping keep the sandwich moist.
- Crispy Breads: If you prefer a bit of crunch with every bite, then Italian bread (ciabatta) could offer this delightful contrast. Crispy breads provide a sturdy structure for the sandwich, ensuring it won’t fall apart easily. The crispy exterior contrasts nicely with the tender chicken, creating a balanced texture
2. Whole Wheat Bread vs. White Bread – What’s the Difference?
Choosing between whole wheat and white bread is often a matter of personal preference. Here’s a breakdown of each option:
- Whole Wheat Bread: This bread has a denser texture and a slightly nutty flavor, making it an ideal complement for a chicken sandwich. The added fiber offers higher nutritional value, making it a great choice for a more filling meal. Its robust flavor pairs well with grilled chicken.
- White Bread: Soft and neutral, white bread is a classic choice for any sandwich. It’s lighter than whole wheat bread, making it ideal for those who prefer a simple, delicious bite. White bread is often used with fried chicken sandwiches because it doesn’t compete with the rich flavor of the chicken
3. To Toast or Not to Toast – That Is the Question
After choosing your bread or bun, you’ll also need to decide whether to toast it. Toasting the bread can add an extra layer of flavor and texture to your sandwich:
- Toasted Bread: Toasting adds a bit of crunch and extra flavor, enhancing the overall sandwich experience. It also helps preserve the bread’s structure, especially if the sandwich contains moist fillings that might make the bread soggy.
- Untoasted Bread: If you prefer a softer sandwich, you can leave the bread untoasted and enjoy it as is. Untoasted bread, particularly soft loaves, will absorb the moisture from the chicken without becoming dry or tough
Essential Toppings for a Flavorful Chicken Sandwich
Toppings play a crucial role in enhancing the taste and texture of a chicken sandwich. They add layers of crunch and freshness, making every bite more enjoyable. Whether you prefer a simple sandwich or one packed with various ingredients, choosing the right toppings can make a big difference. Below are some of the best toppings that pair well with a chicken sandwich.
1. Fresh and Crispy Vegetables
Vegetables help enhance the flavor and add a refreshing contrast to the tender chicken. Some of the best vegetable toppings include:
- Lettuce: A classic option that provides a light, crispy texture. Romaine or iceberg lettuce are great choices, adding a fresh and slightly sweet taste.
- Tomatoes: Sliced tomatoes add juiciness and a mild tangy flavor to the sandwich. It’s best to choose firm, ripe tomatoes to avoid excess moisture that could make the bread soggy.
- Cucumbers: Thin cucumber slices add a cool, crunchy bite that balances the heat of the chicken. They pair particularly well with grilled or roasted chicken.
2. Creamy and Soft Additions
Soft toppings add a rich, smooth texture that contrasts beautifully with the chicken. Some great options include:
- Avocado Slices: Avocado adds a creamy flavor that complements both grilled and crispy chicken.
- Boiled Egg Slices: Adding slices of boiled egg can enrich the sandwich, providing extra protein and a smooth texture.
3. Extra Crunch for a Satisfying Bite
For those who enjoy crunch in their sandwich, this topping will enhance the texture:
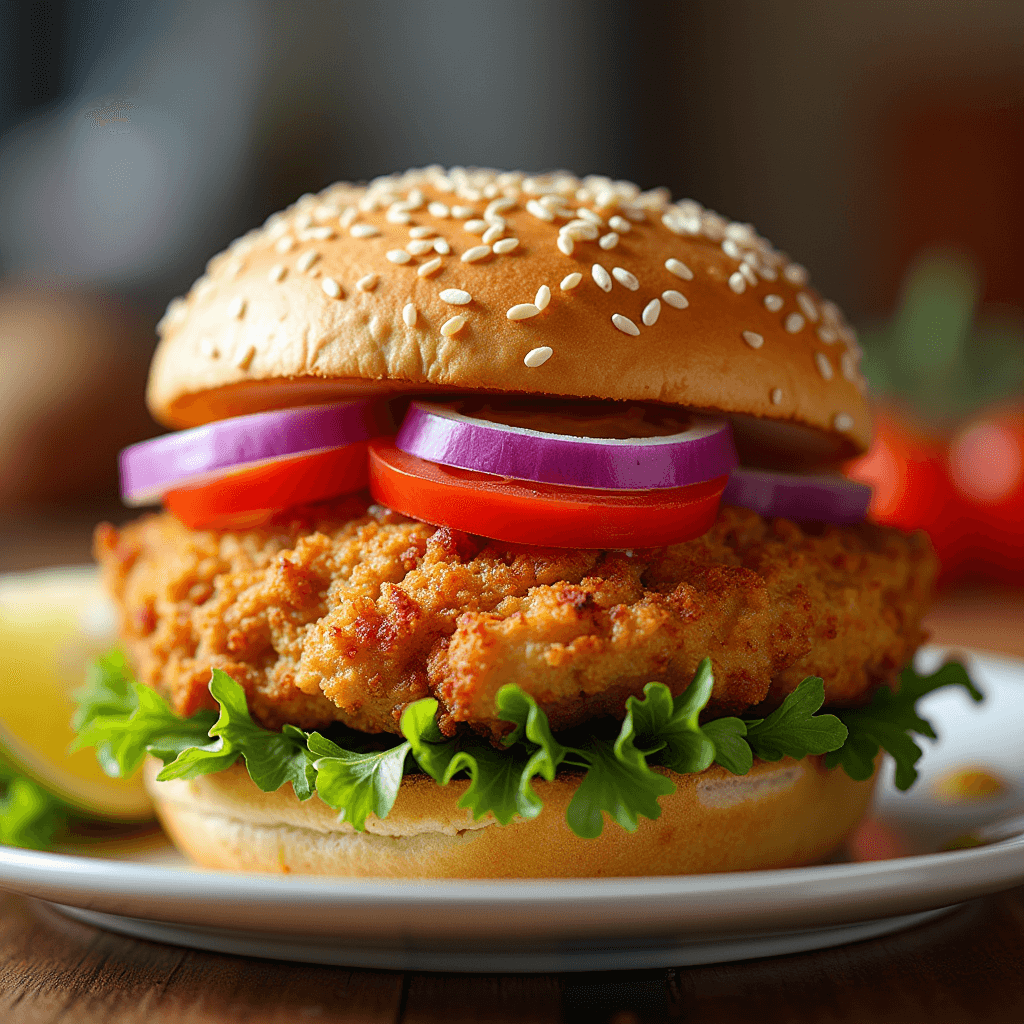
- Crispy Onions: Adding crispy onions gives a rich flavor and a crunchy texture that enhances the overall sandwich experience
How to Cook Chicken for Your Sandwich
Grilling Chicken for a Grilled Flavor
Grilling chicken is an excellent way to add a grilled flavor that pairs wonderfully with fresh sandwich ingredients. Grilling provides a deep flavor that cannot be achieved by other cooking methods. Whether you use a charcoal or gas grill, the key to grilling chicken is balancing cooking time and temperature. Here’s how to grill chicken perfectly for a great grilled taste.
1. Preparing the Chicken for Grilling
Before placing the chicken on the grill, proper preparation ensures it cooks evenly and absorbs the best flavor.
- Choosing the Right Cut: Bone-in cuts like thighs or wings are ideal for grilling as they stay tender during cooking. If you’re using boneless chicken breasts, make sure to monitor the cooking time closely to avoid drying them out.
- Allowing the Chicken to Reach Room Temperature: It’s best to let the chicken reach room temperature for 15-20 minutes before grilling. This helps it cook more evenly and prevents it from drying out.
2. Setting Up the Grill
The way you set up the grill will significantly affect the flavor and texture of the chicken. Here are some important tips:
- Using Charcoal: If you want a richer grilled flavor, choose a charcoal grill. The smoke produced by charcoal adds a distinctive flavor to the chicken. You can also add wood chips to enhance the flavor.
- Gas Grills for Convenience: If you’re using a gas grill, you won’t get the same intense flavor as with charcoal, but you will still get excellent results.
- Indirect Heat for Larger Cuts: For larger cuts of chicken like thighs or whole chickens, use indirect heat by placing the chicken away from direct flames. This method helps cook the chicken thoroughly without burning the exterior.
- Direct Heat for a Grilled Crust: For thinner cuts, such as boneless chicken breasts or tender chicken pieces, direct heat is best. This method helps form a crispy crust on the outside while keeping the chicken tender on the inside.
3. Grilling the Chicken Perfectly
Grilling chicken requires patience and attention to detail to ensure it cooks properly without burning or drying out.
Flipping the Chicken: It’s best to flip the chicken once or twice during grilling to ensure it cooks evenly and maintains its shape
Maintaining the Right Temperature: Preheat the grill to medium-high heat (around 180-200°C or 350-400°F). This will help cook the chicken properly, giving it a golden grilled crust on the outside and tender on the inside.
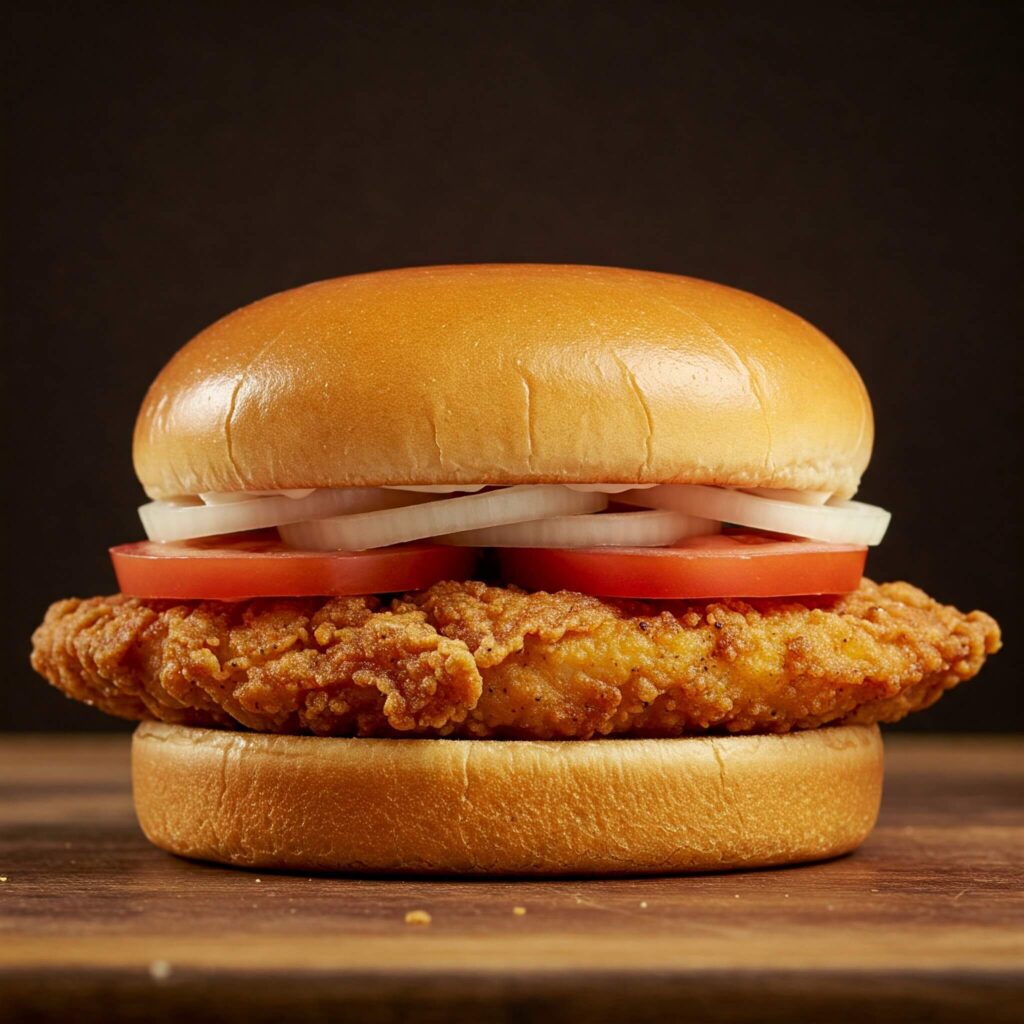
Frying Chicken for Extra Crispiness
Achieving a crispy, golden-brown crust when frying chicken is essential for a delicious sandwich. The right frying technique ensures that the exterior is crunchy while keeping the inside tender and juicy. Here’s a step-by-step guide to frying chicken for the perfect texture and flavor.
1. Preparing the Chicken for Frying
Before frying, it’s important to prepare the chicken properly to ensure even cooking and maximum crispiness.
- Choosing the Right Cut: Boneless chicken breasts or thighs are ideal for frying. Thighs tend to be more tender and flavorful, while breasts provide a firm texture.
- Drying the Chicken: Pat the chicken dry with paper towels to remove any excess moisture. This helps the coating adhere better and reduces splattering during frying.
2. Coating the Chicken for the Perfect Crunch
Properly coating the chicken ensures a crunchy and golden-brown crust. Here’s how to achieve that:
- Layering the Coating: A double coating creates a crispier shell. Dip the chicken in a dry mixture, followed by a wet mixture, then dip it back into the dry mixture for a thick and crispy crust.
- Using Flour: A flour coating creates a light, flaky crust.
- Letting the Coating Set: Allow the coated chicken to rest for a few minutes before frying. This helps the coating adhere better and prevents it from separating during cooking.
3. Choosing the Right Oil and Frying Technique
Frying the chicken at the right temperature is crucial for achieving a crispy exterior without making it greasy.
- Oil Selection: Use oils with a high smoke point, such as vegetable oil, to prevent burning and ensure a clean taste.
- Optimal Temperature: Heat the oil to around 170-180°C (340-360°F). If the oil is too hot, the coating may burn before the chicken cooks through. If it’s too cool, the chicken will absorb too much oil, making it greasy instead of crispy.
- Frying in Batches: Avoid overcrowding the pan as it lowers the oil temperature, leading to uneven frying. Fry the chicken in small batches for the best results.
- Draining Excess Oil: Once the chicken is crispy and golden brown, place it on paper towels to drain any excess oil, keeping the crust crispy
Baking Chicken
Baking chicken is one of the simplest and most versatile cooking methods. It allows you to achieve a tender interior with a golden, slightly crispy crust on the outside. Whether you’re using chicken breasts, thighs, or a whole chicken, baking provides consistent results with minimal effort, making it perfect for a delicious chicken sandwich. Here’s how to bake chicken perfectly to get a great taste for your sandwich.
1. Preparing the Chicken for Baking
Proper preparation is key to ensuring the chicken bakes evenly.
- Choosing the Right Cut: While you can bake any part of the chicken, different cuts require different baking methods. Cuts with bones, such as thighs or wings, remain flavorful during baking. Boneless chicken breasts, however, can dry out if overcooked. The cut you use determines the ideal baking time.
- Drying the Chicken: Before baking, it’s recommended to pat the chicken dry with paper towels. This helps achieve a golden, crispy crust by preventing steam from affecting the chicken’s outer layer.
2. Setting the Oven Temperature
The right oven temperature is crucial for achieving tender and delicious baked chicken. Here’s how to set it properly:
- Preheating the Oven: Preheat your oven to 375°F (190°C) for the best results. This temperature ensures the chicken cooks evenly and prevents it from burning before fully cooking.
- Baking: Baking is typically done at a moderate temperature to ensure the chicken cooks through without drying out. If you want a crisper crust, you can finish the baking process by increasing the temperature for the last 10-15 minutes.
3. Cooking the Chicken Perfectly
Baking chicken requires patience and attention to detail to ensure it’s cooked properly without burning or drying out.
- Baking Boneless Chicken Breasts: If you’re baking boneless chicken breasts, bake them for 20-30 minutes. If using bone-in cuts, increase the baking time to 35-45 minutes.
- Baking a Whole Chicken: If roasting a whole chicken, the general rule is to cook it for 20 minutes per pound at 375°F (190°C). For example, a 3-pound chicken will need about 1 hour.
- Covering the Chicken: To retain moisture, you can cover the chicken with aluminum foil during the first part of the baking process. This helps the chicken cook in its own juices, keeping it tender. Remove the foil during the last 10-15 minutes to allow the crust to become crispier.
4. Checking for Doneness
To ensure the chicken is cooked through, check its internal temperature. The chicken is ready when its internal temperature reaches 165°F (75°C). If you don’t have a thermometer, you can also cut the chicken to check if it’s fully cooked.
5. Letting the Chicken Rest
Once the chicken is fully cooked, let it rest for 5-10 minutes before slicing
Serving Ideas and Sides to Enjoy with Your Chicken Sandwich
French Fries
French fries are the classic and beloved addition to any chicken sandwich, offering the perfect balance of flavors. Whether you’re looking for golden, crispy fries, these side dishes elevate your meal and add enjoyment to your dining experience. Here’s a closer look at how to prepare these delicious additions to complement your sandwich.
1. Types of French Fries
- French Fries: The traditional choice for any sandwich. Potatoes are usually cut into long, thin strips and fried until perfectly cooked. They are crispy on the outside and tender on the inside. You can prepare them according to your preferences.
2. Cooking Methods
- Deep Frying: The traditional method for preparing French fries is deep frying. This method gives the fries a crispy texture that is irresistible on the outside while keeping the inside tender. For perfect fries, make sure the oil is hot (around 350°F/175°C) and ensure the oil is fresh for the best results.
- Baking: If you prefer a lighter method, baking is an excellent option. Coat the potato slices with a little oil, then bake them at high temperature (around 425°F/220°C) until golden and crispy.
- Air Frying: A method that has gained popularity recently, air frying allows you to make crispy fries using minimal oil. By circulating hot air around the food, the air fryer mimics the crispy texture of deep frying but with less fat.
3. Pairing French Fries with Chicken Sandwich
French fries are the perfect companion for a chicken sandwich, offering a wonderful contrast to the tender and savory flavors of the chicken. Whether you prefer the extra crunch of crispy fries or the classic fries, both options add texture and flavor to enhance the sandwich.
- French Fries with Crispy Fried Chicken Sandwich: If your sandwich contains fried chicken, pairing it with crispy French fries adds extra crunch, creating a delicious contrast.
- French Fries with Grilled Chicken Sandwich: For grilled chicken sandwiches, French fries provide a light, crispy addition without overpowering the grilled chicken’s flavors
Salads to Complement Your Sandwich
Adding a fresh salad alongside your chicken sandwich enhances the meal by providing a light, crunchy element that pairs well with the taste of chicken, making the meal more balanced and enjoyable. Here are some great salad options that work well with a chicken sandwich.
1. Simple Fresh Vegetable Salad
A basic vegetable salad is a great option to add a fresh and crunchy element to your meal. This type of salad typically includes:
- Lettuce or mixed greens as a crisp base
- Tomatoes for a refreshing flavor
- Cucumbers to add extra freshness and crunch
- Carrots for a slightly sweet flavor and extra crunch